Auto Animator
Full documentation for Auto Animator including installation, features, modifier keys, and troubleshooting.
Installation
Log in to your dashboard at toolsformotion.com/dashboard to download the latest version of Auto Animator. You will download a .zip file containing the tool.
Unzip the file, then place the Auto Animator .jsxbin file in your After Effects ScriptUI Panels folder.
- Mac: /Applications/Adobe After Effects [version]/Scripts/ScriptUI Panels/
- Windows: C:\Program Files\Adobe\Adobe After Effects [version]\Support Files\Scripts\ScriptUI Panels\
Restart After Effects, then open the panel from Window > Auto Animator. You can dock it anywhere in your workspace like any other panel.
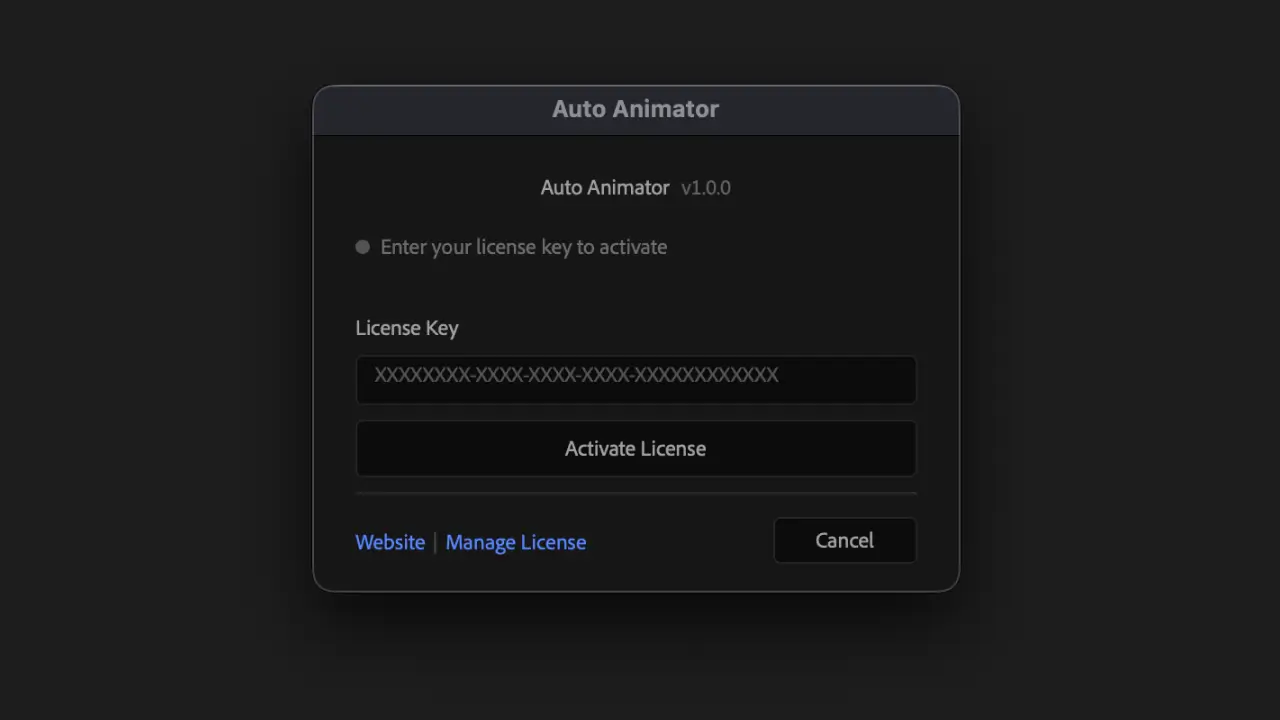
On first launch, you will be prompted to enter your license key. You can find your license key in your dashboard. Copy it, paste it into the activation window, and click Activate. You can also manage your activations and deactivate old machines from your dashboard.
Quick Start
- 1
Select one or more layers
- 2
Toggle the properties you want to animate (Position, Scale, Rotation, Opacity)
- 3
Click a direction on the direction pad
That's it. Your layers now have IN and OUT animations.
The Two Modes
Auto Animator has two modes. Pick the one that fits your workflow.
Expression Mode
Animations are driven by expressions tied to your layer's in and out points. Move a layer on the timeline and the animation follows automatically. All parameters stay live and editable in the effect controls.
Best for: Flexible timing, quick iterations, animation that needs to adapt.
Keyframe Mode
Animations are baked as real keyframes. Full manual control. You can adjust them by hand, copy them to other projects, or hand them off to other animators.
Best for: Precise control, collaboration, projects where you need traditional keyframes.
Switching Modes
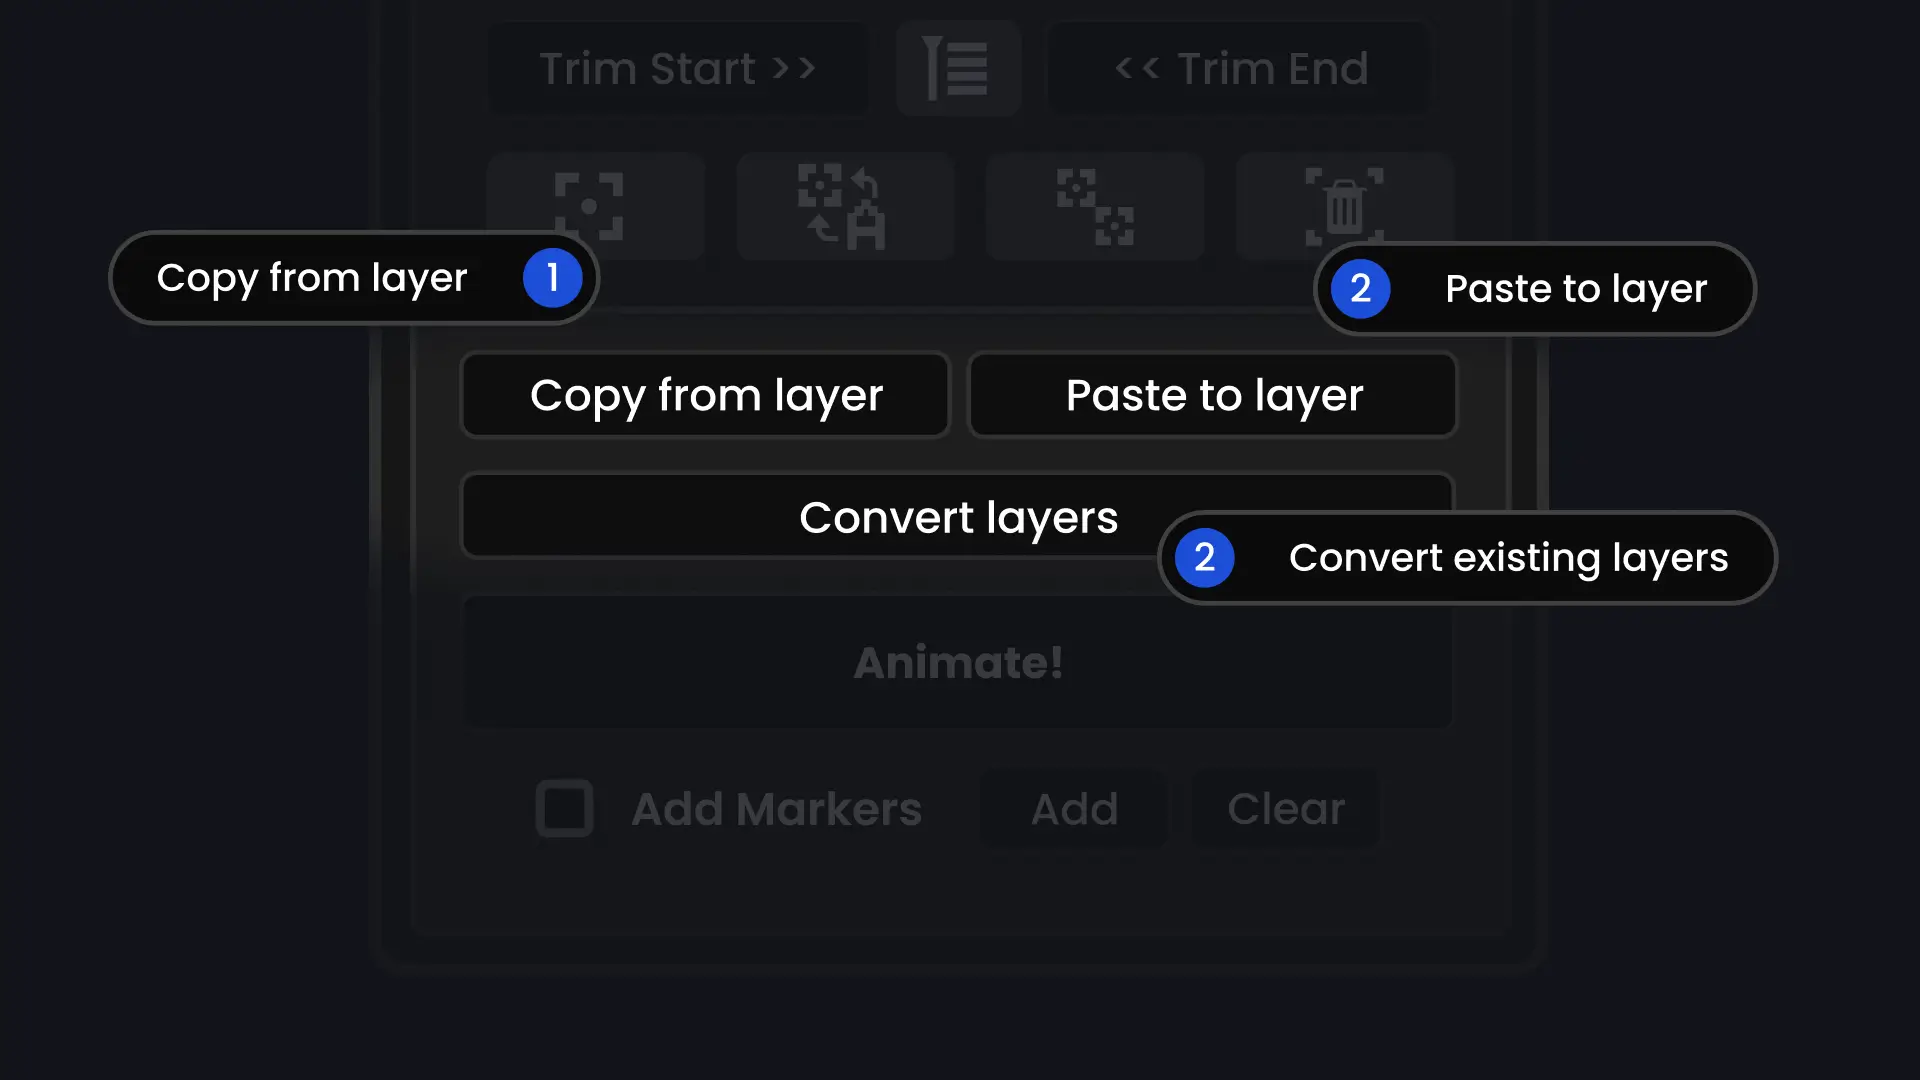
Click the mode toggle at the top of the panel to switch. You can also convert existing animations from one mode to the other using the Convert Layers button.
You can also copy animation settings from one layer and paste them onto others, even across modes. See the Copy and Paste section for details.
Basic Workflow
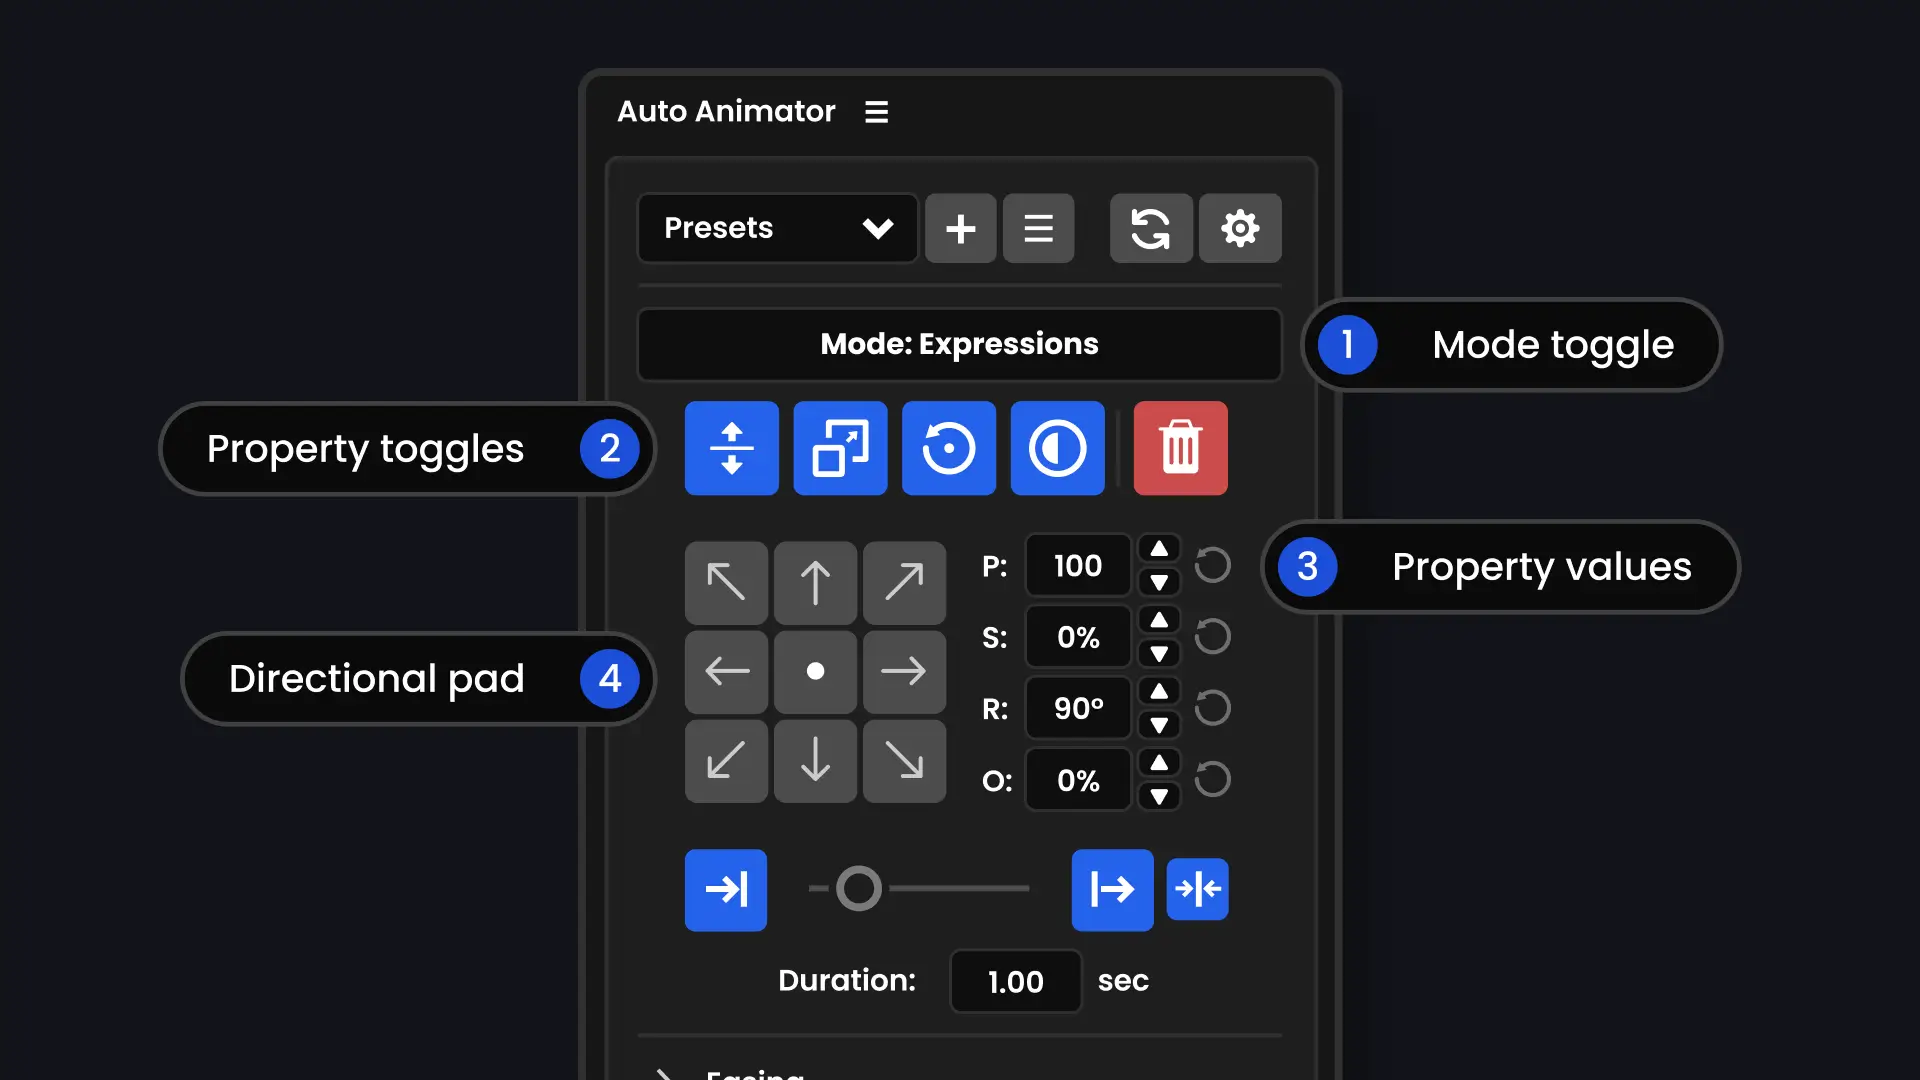
Properties
Toggle which properties to animate using the four buttons: Position, Scale, Rotation, Opacity. Enable any combination. Each property has a value field next to it:
- Position (P): Distance in pixels
- Scale (S): Percentage (0% = invisible, 100% = no change)
- Rotation (R): Degrees
- Opacity (O): Percentage (0% = invisible, 100% = fully visible)
Use the up/down arrows to adjust values:
Direction
Click one of the 8 directions on the direction pad, or click the center for a scale/fade from center. The direction only affects Position. Scale, Rotation, and Opacity animate from their set values regardless of direction.
Duration
Set how long the animation takes in seconds. This applies to both IN and OUT unless you override the OUT duration separately.
Easing
Choose an easing curve for your IN and OUT animations. See the Easing Curves section for details.
IN and OUT Animations
Every animation has two parts:
- IN: How the layer enters (animates from the set values to normal)
- OUT: How the layer exits (animates from normal to the set values)
By default, IN and OUT use the same settings. If you want different behavior for the exit animation, use OUT Overrides.
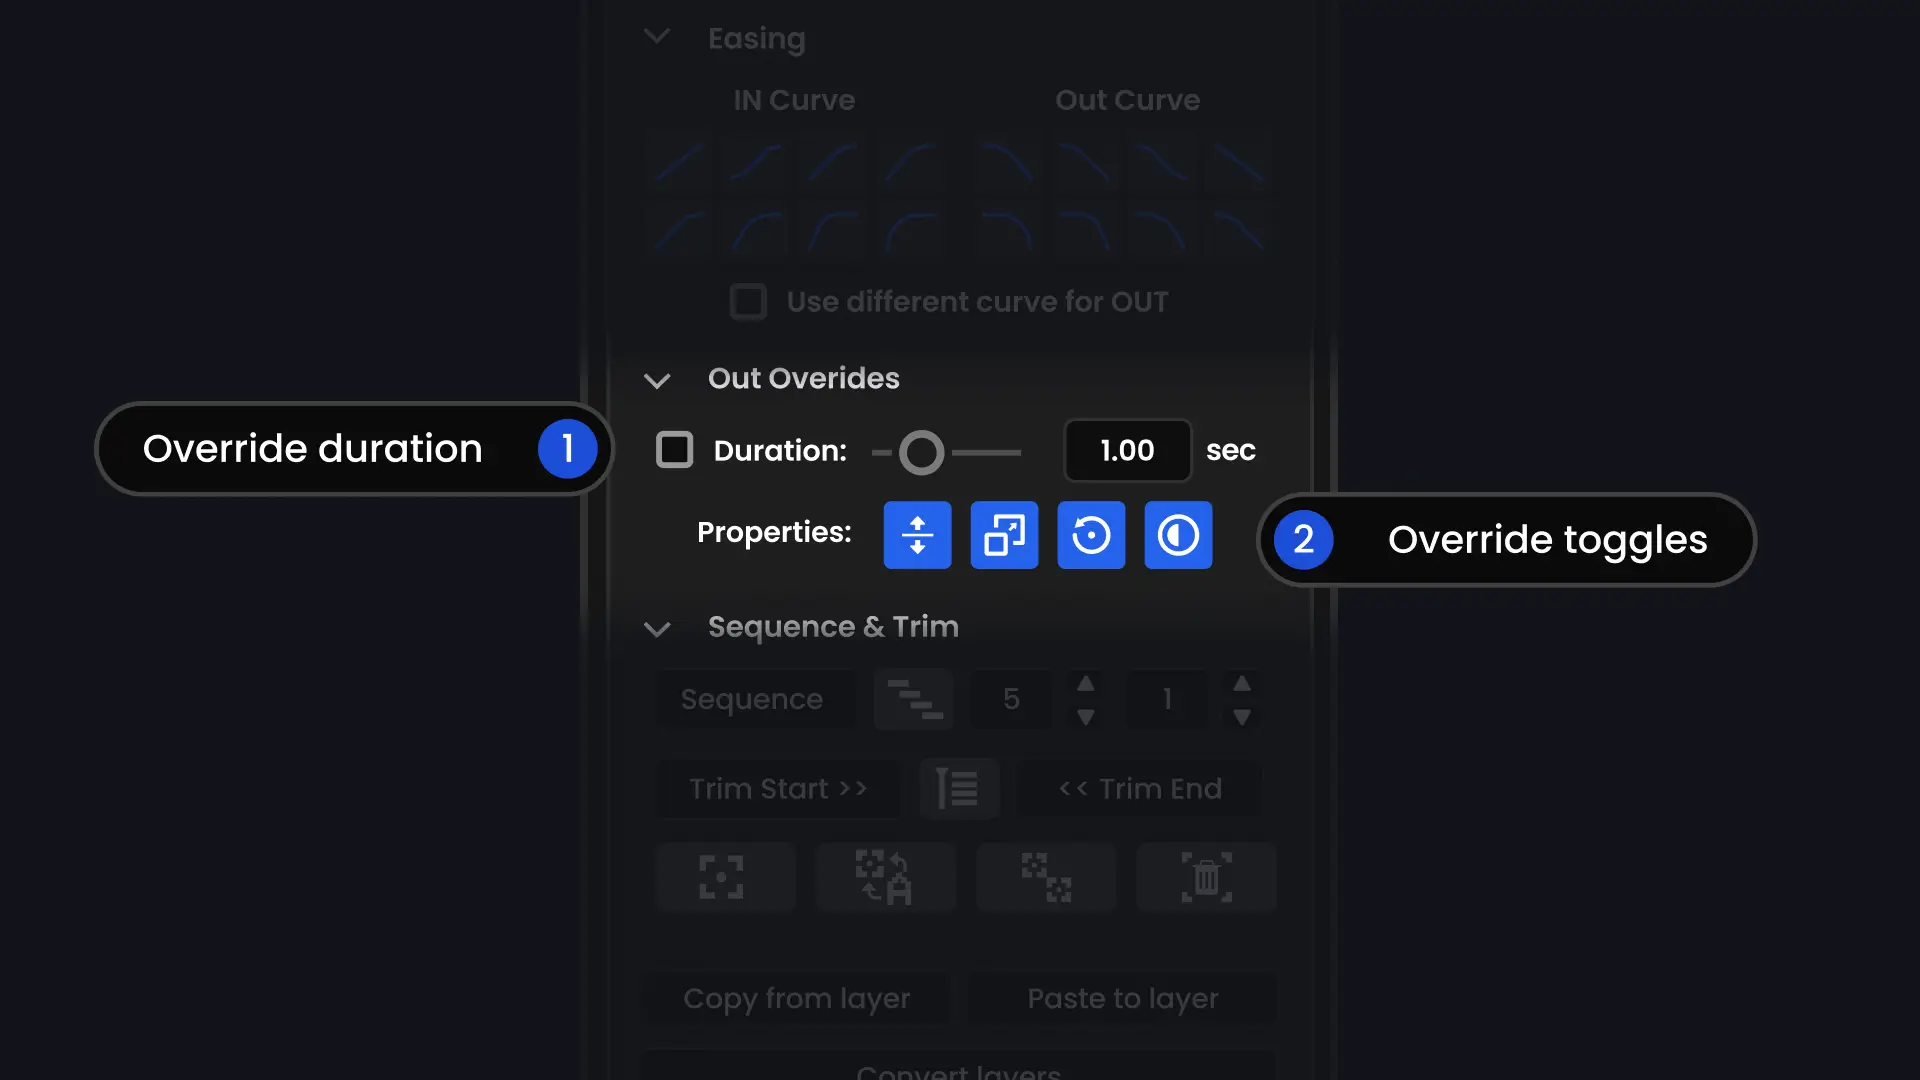
OUT Overrides
Expand the OUT Overrides section to set independent values for the exit animation:
- Different duration
- Different easing curve
- Different properties enabled
This lets you do things like a fast pop-in with a slow fade-out.
Easing Curves
Choose how your animation accelerates and decelerates.
- Linear: Constant speed, no easing
- Ease: Gentle acceleration and deceleration
- Sine: Smooth, subtle easing
- Quad: Moderate easing
- Cubic: Stronger easing
- Quart: Even stronger easing
- Quint: Very strong easing
- Expo: Dramatic, punchy easing
You can set different curves for IN and OUT. Check "Use different curve for OUT" to enable separate OUT curve selection, otherwise the OUT curve will be mirrored.
Working with Multiple Layers
Direction Pad
The direction pad controls which direction each layer animates from. Select your layers and click a direction to apply the same animation to all of them. The direction pad also supports modifier keys for inverting properties.
Animate Button
The Animate button applies animation using the current direction pad setting, but also offers modifier keys for randomising the direction across multiple layers. This is useful when you want each layer to animate from a different direction.
Sequence and Stagger
Expand the Sequence and Trim section to offset the timing of multiple layers. The Sequence button staggers layers by a set number of frames. Layers animate one after another instead of all at once.
Use the Offset field to set how many frames between each layer. The Order dropdown lets you choose the stagger order (top to bottom, bottom to top, or random).
Trim
Trim the in or out points of your selected layers to the playhead. The animation keyframes or expressions move with the trim so everything stays in sync. Use the Trim IN button for in points and Trim OUT for out points.
Align
Quickly align all selected layers to a common point. Useful for snapping layers into position after staggering.
Removing Animation
Click the remove button (X) to strip Auto Animator animation from selected layers.
Presets
Save your favourite setups and load them instantly.
Saving a Preset
- 1
Set up your animation parameters
- 2
Click the + button
- 3
Enter a name
- 4
Click Save
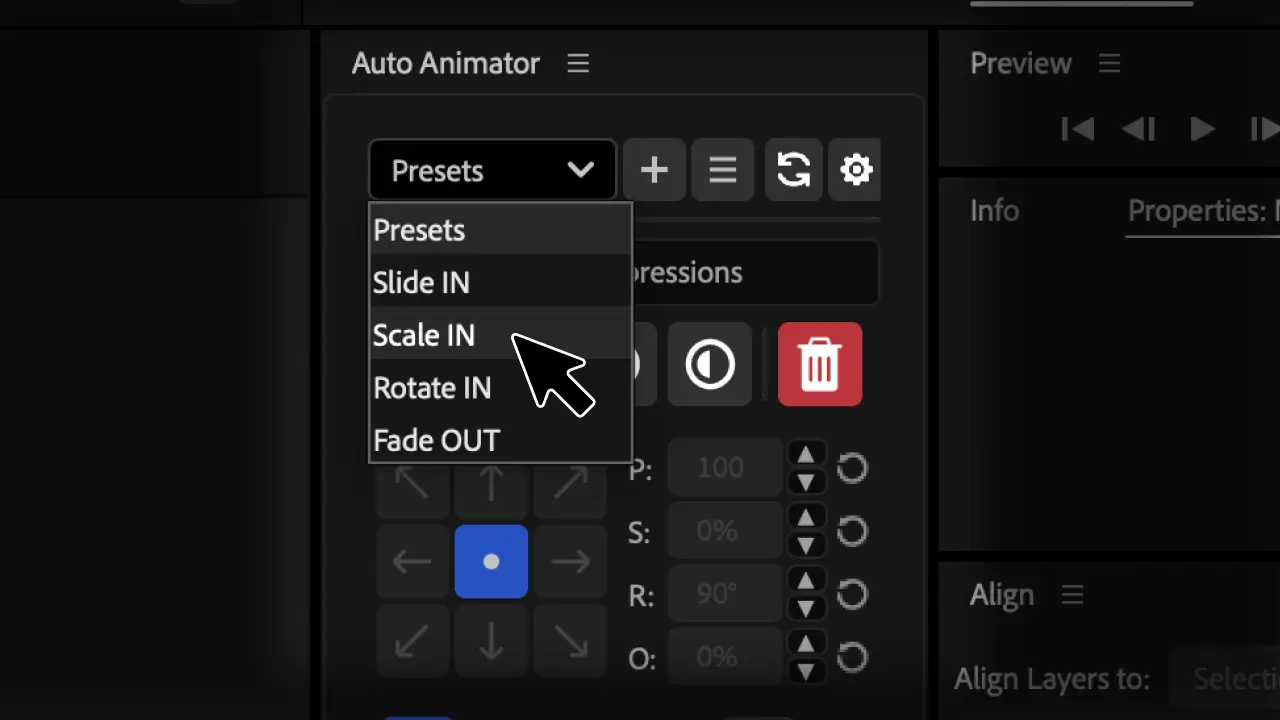
Loading a Preset
Select a preset from the dropdown. Your panel settings update immediately.
Resetting
Click the reset button to return all settings to defaults.
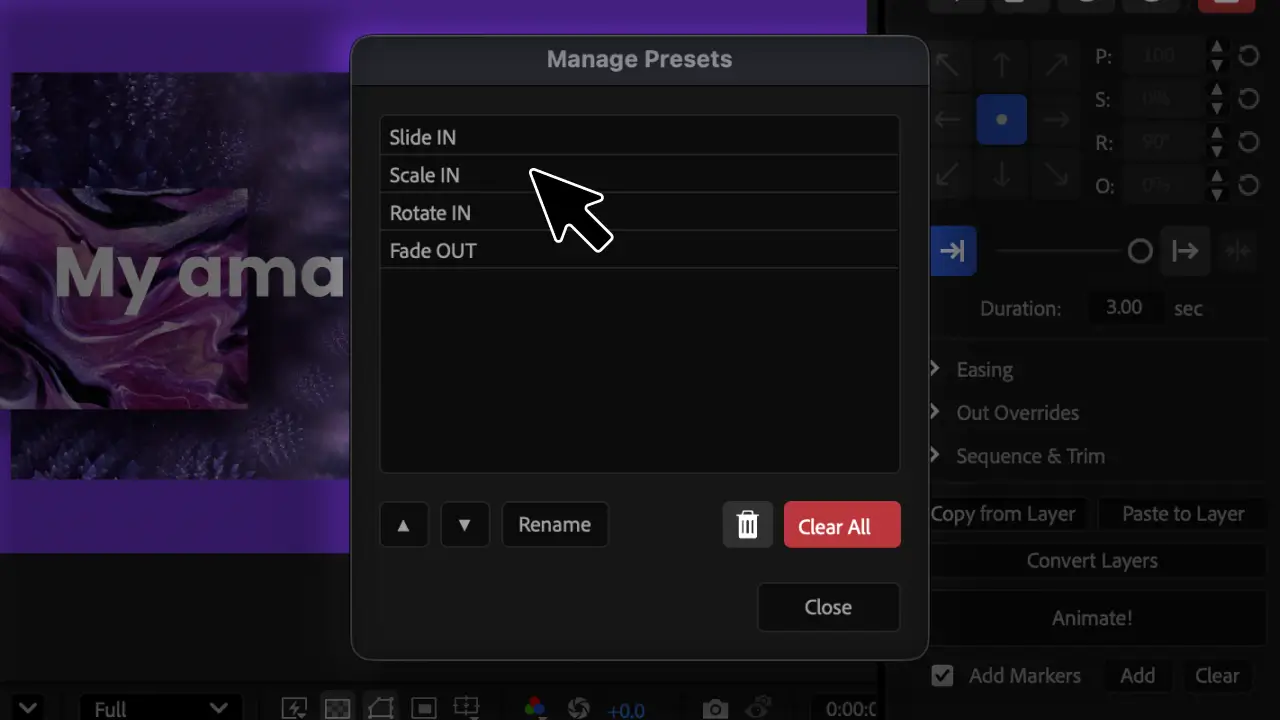
Managing Presets
Click the manage button to open the Manage Presets dialog. From here you can reorder presets with the up/down arrows, rename them, delete individual presets, or clear all presets at once.
Null Tools
Tools for organizing animations with null layers.
Group Under Null
Select layers and click the null icon to parent them all under a new null layer. Useful for moving animated groups together.
Transfer Keyframes
Move animation keyframes between layers and their parent nulls.
Opacity Control
When layers are grouped under a null, the null's opacity controls all child layers at once. Adjust the null's opacity instead of keyframing each layer individually.

Copy and Paste
Copy animation settings from one layer and apply them to others.
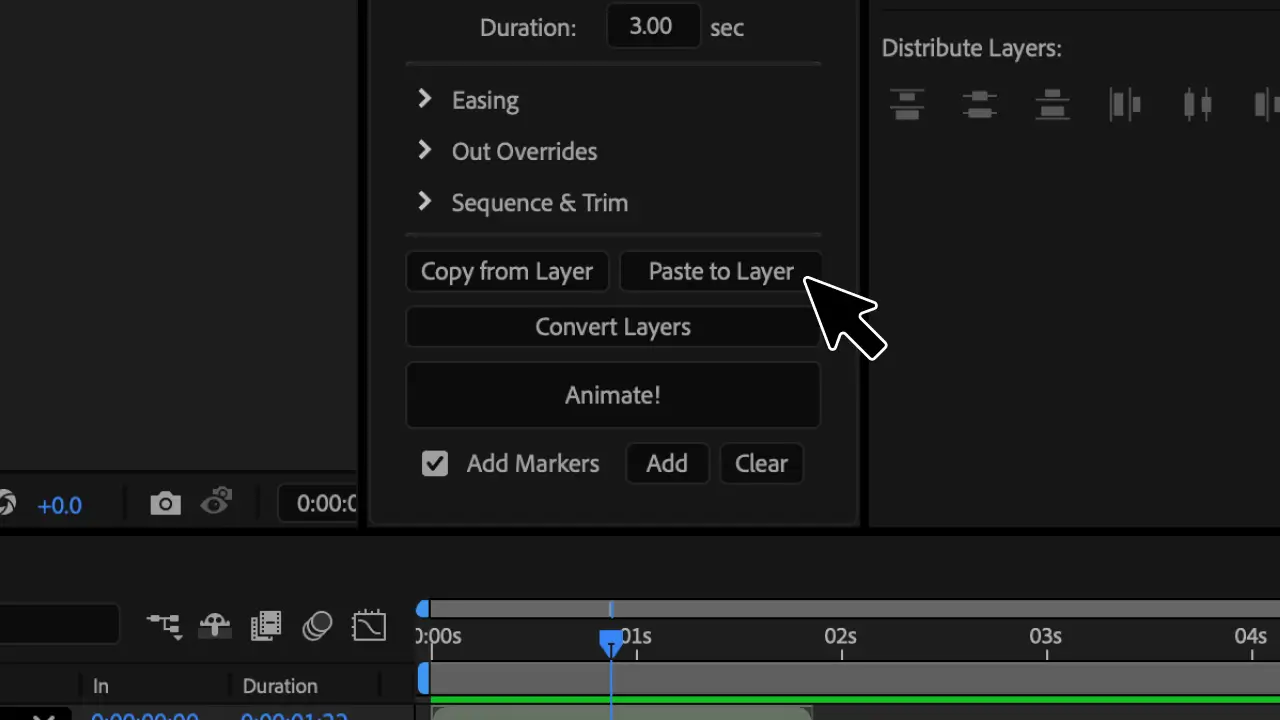
Copy from Layer
Select an animated layer and click Copy from Layer. This captures the animation parameters (timing, easing, direction, values).
Paste
Select target layers and click the second Copy from Layer button to paste the copied animation.
Settings
Click the gear icon to open Settings. The dialog is split into two columns: Default Values on the left, and Out Overrides, Sequence Defaults, and License on the right.
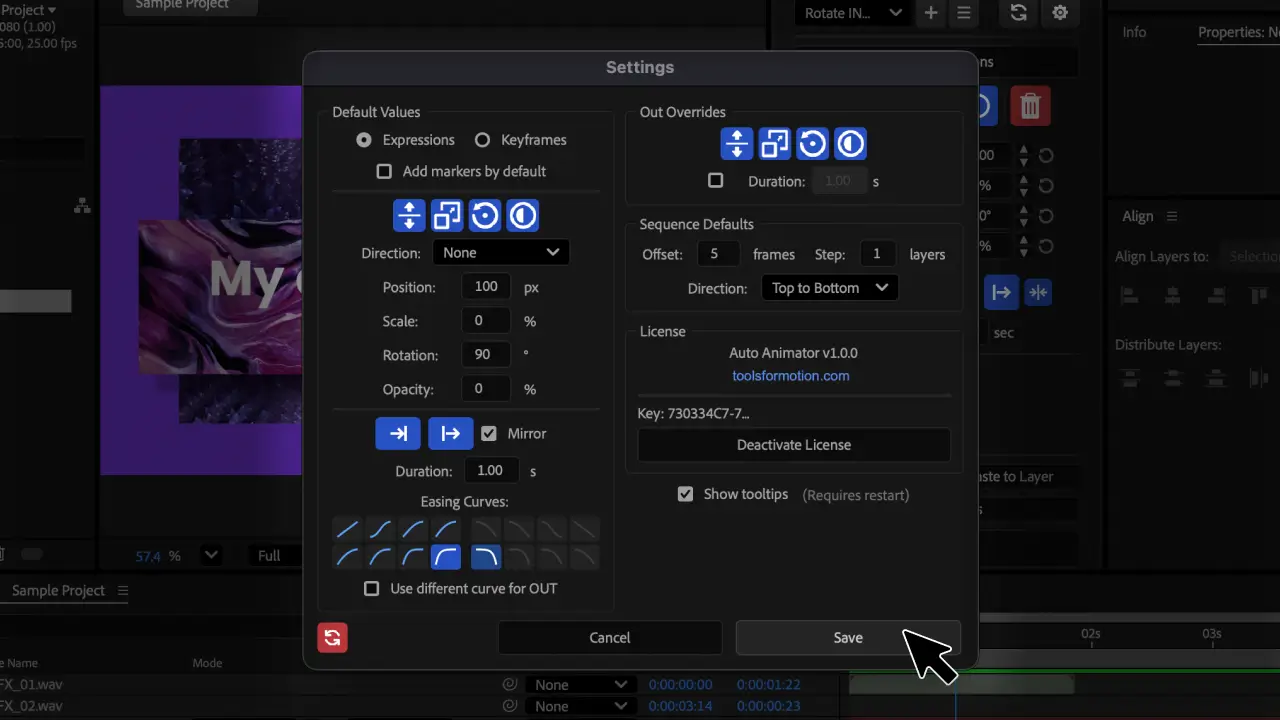
Default Values
Set the default state for the panel when it opens. This includes the output mode (Expressions or Keyframes), which properties are enabled, direction, property values, IN/OUT toggles, duration, and easing curves. These defaults are applied every time you reset the panel or restart After Effects.
Out Overrides
Set default OUT override properties and an optional separate OUT duration. These match the OUT Overrides section in the main panel.
Sequence Defaults
Set the default offset (in frames), step (in layers), and stagger direction for the Sequence tool.
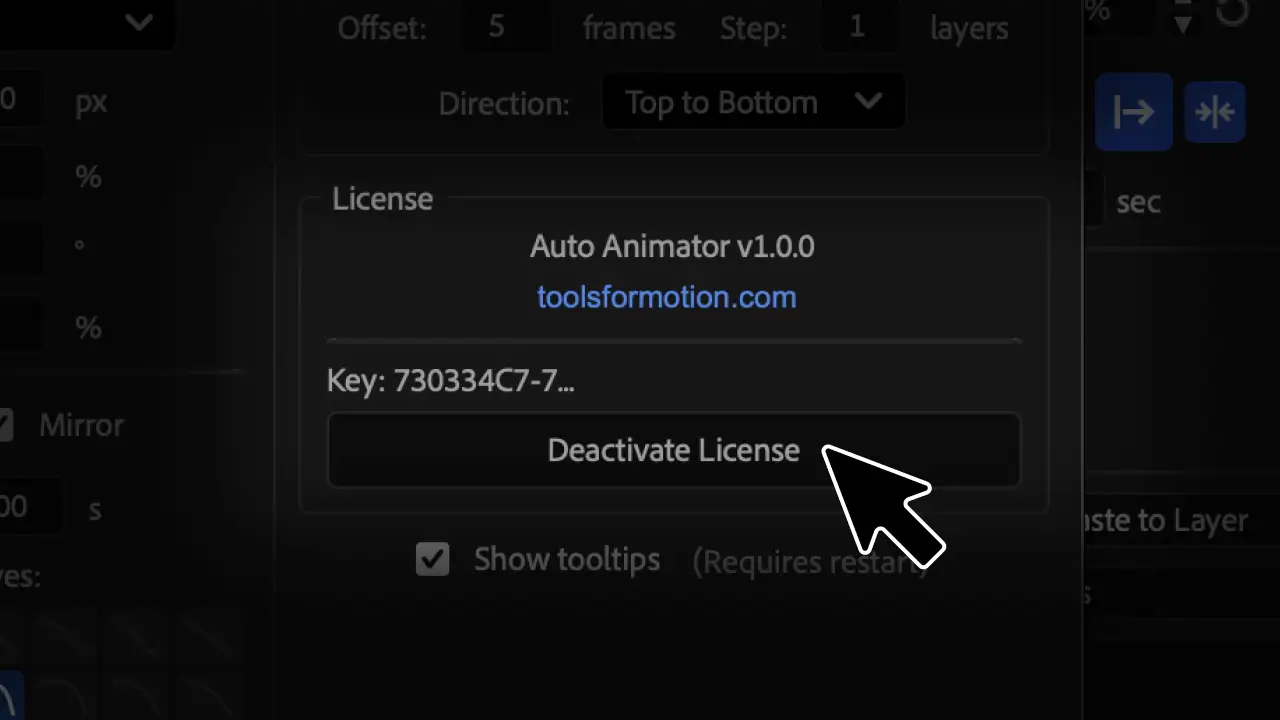
License
View your current license key and the tool version. Click the toolsformotion.com link to visit the website. Use the Deactivate License button to release your activation, for example when moving to a new machine.
Factory Reset
Click the red reset icon at the bottom-left of the Settings dialog to restore all settings to their factory defaults. Your presets will not be deleted.
Troubleshooting
Animation not applying
Make sure at least one property (P, S, R, O) is enabled before clicking a direction.
Expressions error
Check that your After Effects expressions engine is set to JavaScript (File > Project Settings > Expressions).
Layers not staggering
Select multiple layers before using the Sequence tool.
Need help?
Contact support@toolsformotion.com